Run your first Agentic Bench test
This quickstart runs a small Coding Agent test on one machine. It uses a configuration that passed every trial in Metrum validation runs, so you can confirm your setup works before you design a larger test.
Time: about 10 minutes to configure. The run takes about 20 to 45 minutes. Most of that time is cluster setup and the model download. The agent work itself takes a few minutes.
Before you begin
Check each item. When one is missing, the run stops at the stage that needs it, and the stage tracker names the problem.
- A machine onboarded to Metrum AI Bench. The Metrum agent runs on it and reports its GPUs and CPUs. See the main Quickstart and Server management for onboarding.
- One or more GPUs with at least 80 GB of memory each. The example model needs about 28 GB for its weights, plus room for the KV cache, the model's working memory for each request, which grows with long agent prompts. Metrum ran this model with one copy per GPU on 96 GB RTX PRO 6000 Blackwell GPUs, and split across two 80 GB H100 GPUs. For smaller GPUs, see Tested configurations, which includes two 48 GB L40S GPUs at tensor parallel size 2.
- Free disk space of at least 2.2 times the model weights, plus 1 GiB for each agent at your highest concurrency level, plus up to 200 GB for the sandboxes' package cache. For this example, plan for about 300 GB.
- Free memory of at least 8 GiB, plus half the model weights, plus 256 MiB for each agent at your highest level.
- A clock that can synchronize. The agent waits until chrony, an NTP (Network Time Protocol) client, reports the clock within 0.5 seconds, and installs chrony when it is missing.
- A Hugging Face token in your account settings if you use a gated or private model. The example model is public and needs no token.
- Network access from the machine to Hugging Face, public container registries, and GitHub. See Network access.
Step 1: Create the project
- In the top navigation, select Projects, then New project.
- In Project name, enter a name you will find later, for example
First Agentic Bench run. - In Who can see it, keep Team to share the project with your organization, or choose Private.
- Under Add a workload, in the Agentic Benchmarking card, select AgentBench.
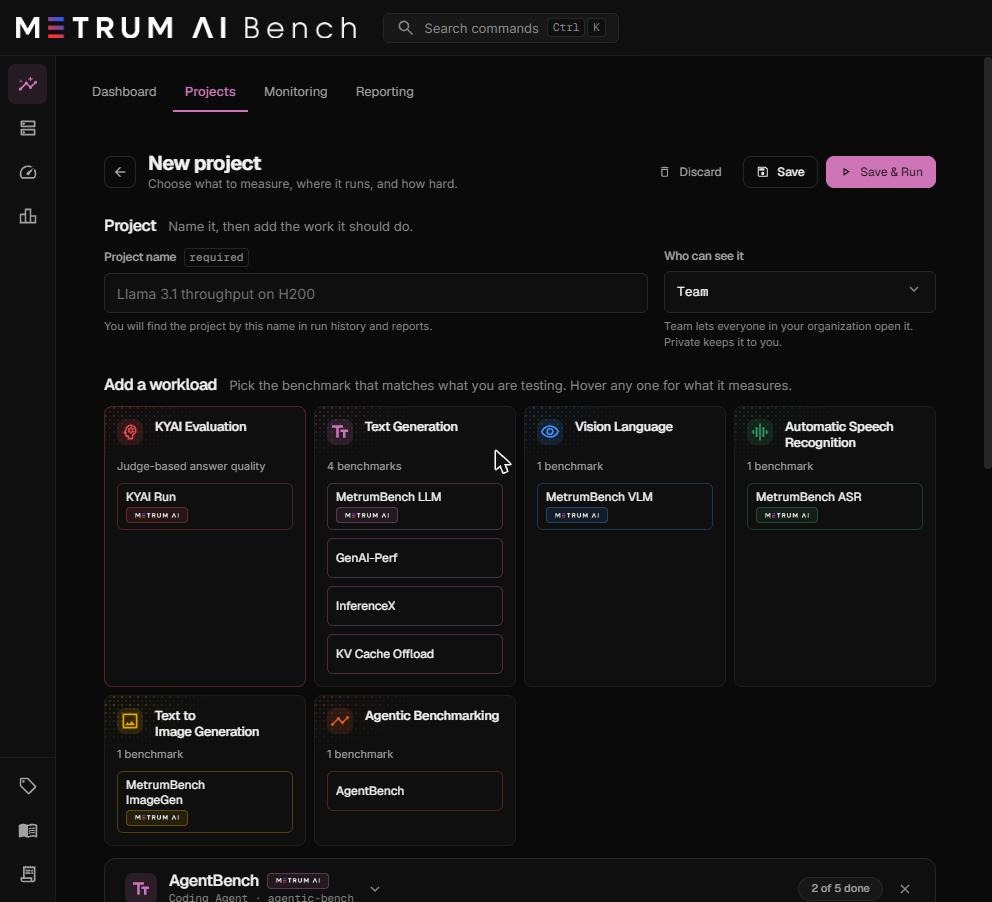
An AgentBench workload card opens below the catalog. It has five steps. A green check mark appears on each step when its required fields are complete.
Step 2: Choose the agent work
- In Workload, keep Coding Agent.
- In Task set, keep Terminal-Bench 2.0.
- In Task codes, remove any default task, then select fix-git from the list.
- Select Next: model.
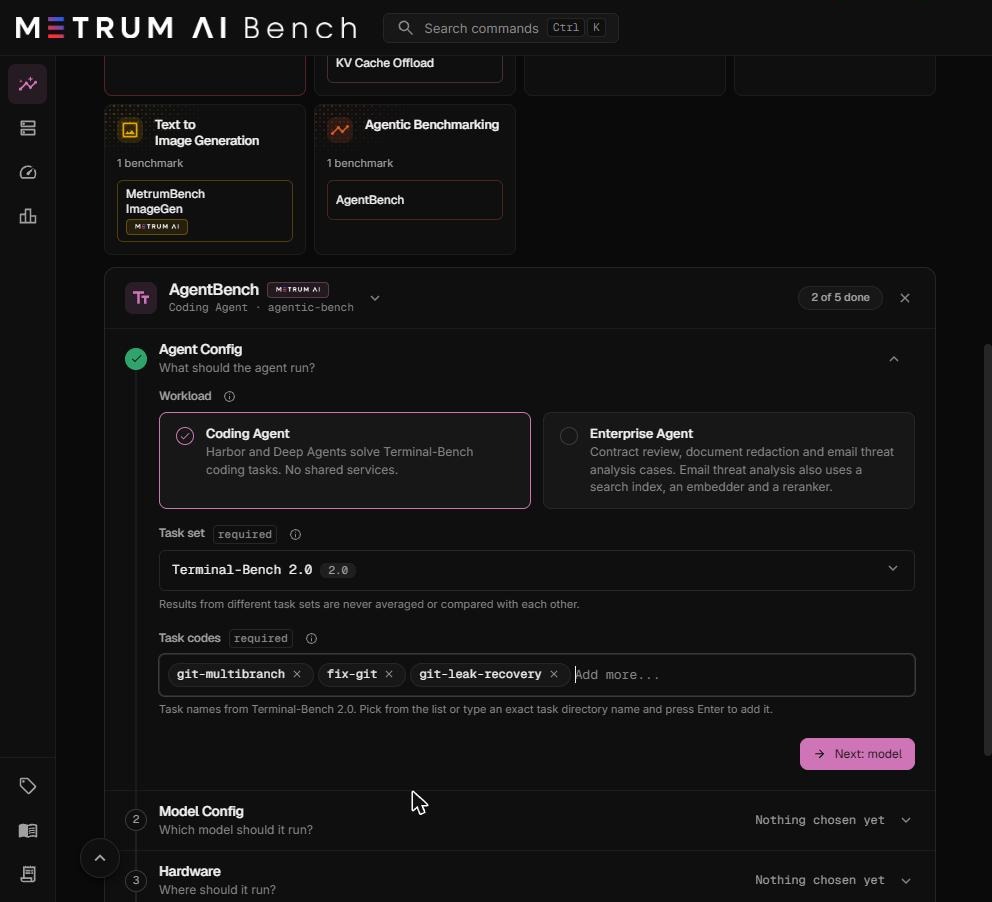
The screenshot shows three task codes. For this quickstart, one task, fix-git, is enough. It repairs a broken git repository and usually finishes in under 3 minutes.
Step 3: Choose the model
- In Serving framework, keep vLLM.
- In Model, select Qwen 3.8 27B FP8.
- In Version, select 0.28.0.
- Leave Build variant on Automatic. The run uses the CUDA build on NVIDIA GPUs and the ROCm build on AMD GPUs.
- Do not change Engine args. The tool-calling settings the agent needs are filled in from the model's approved profile.
- Select Next: hardware.
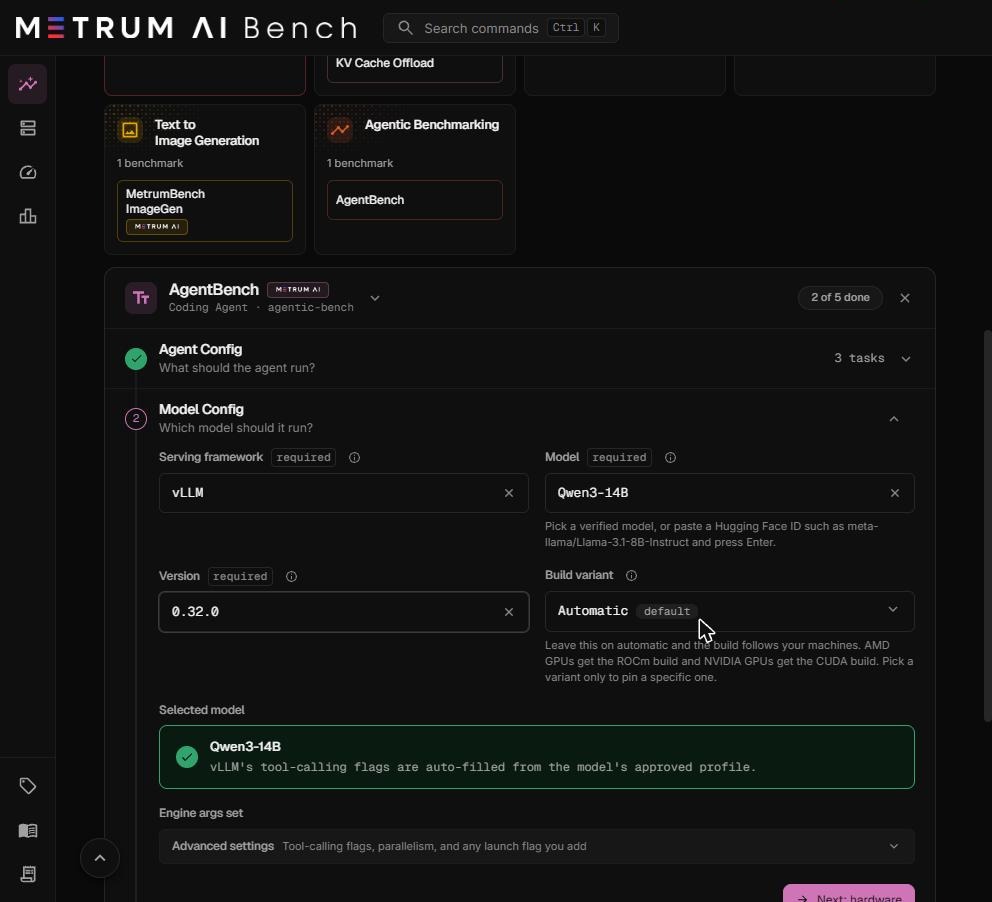
The green Selected model box confirms the model is verified for Agentic Bench.
Step 4: Choose the hardware
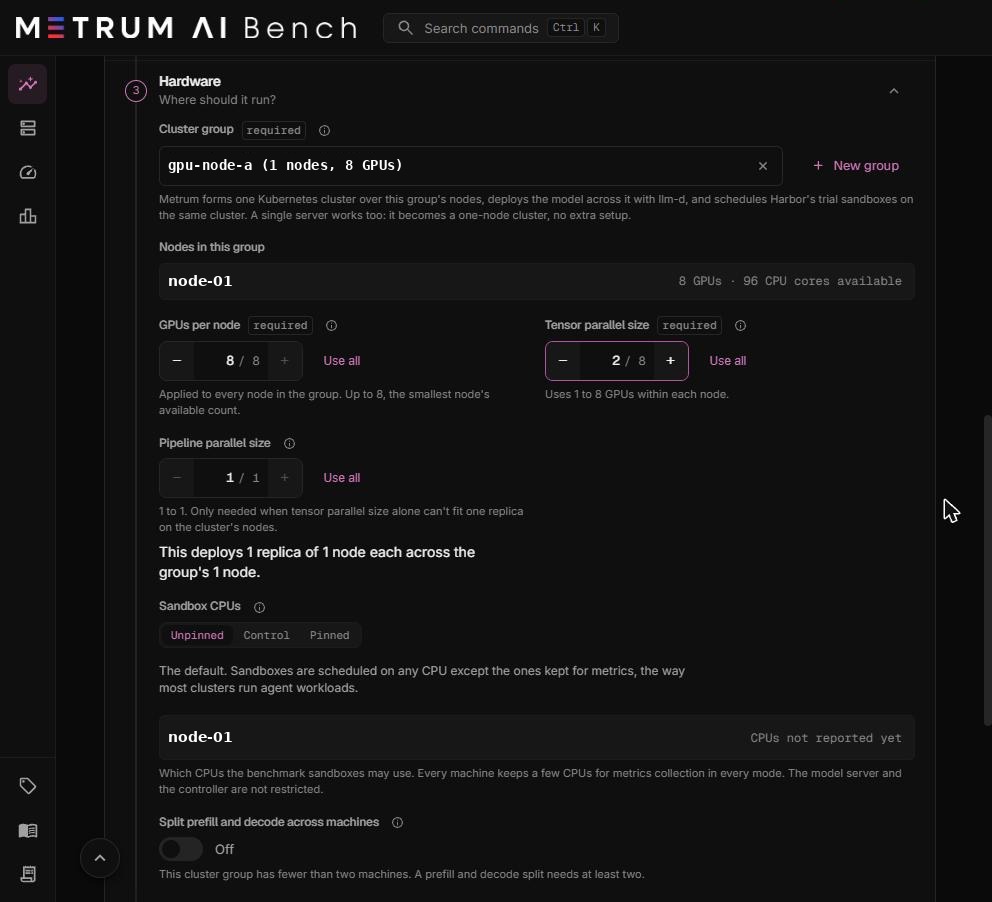
- In Cluster group, select a group that holds your machine. If you have none, select New group, enter a name, add your machine, and select Create.
- In GPUs per node, select Use all, or enter the number of GPUs to use.
- In Tensor parallel size, enter 1. Each GPU then runs its own copy of the model, which gives the most capacity for a model that fits on one GPU.
- Keep Pipeline parallel size at 1.
- Keep Sandbox CPUs on Unpinned.
- Keep Split prefill and decode across machines off.
- Leave the sandbox settings at their defaults.
- Select Next: load.
Step 5: Set the load
- In Concurrency levels, enter 1, 8, and 32. Press Enter after each number.
- In Trials per task, keep 3.
- Select Next: SLA.
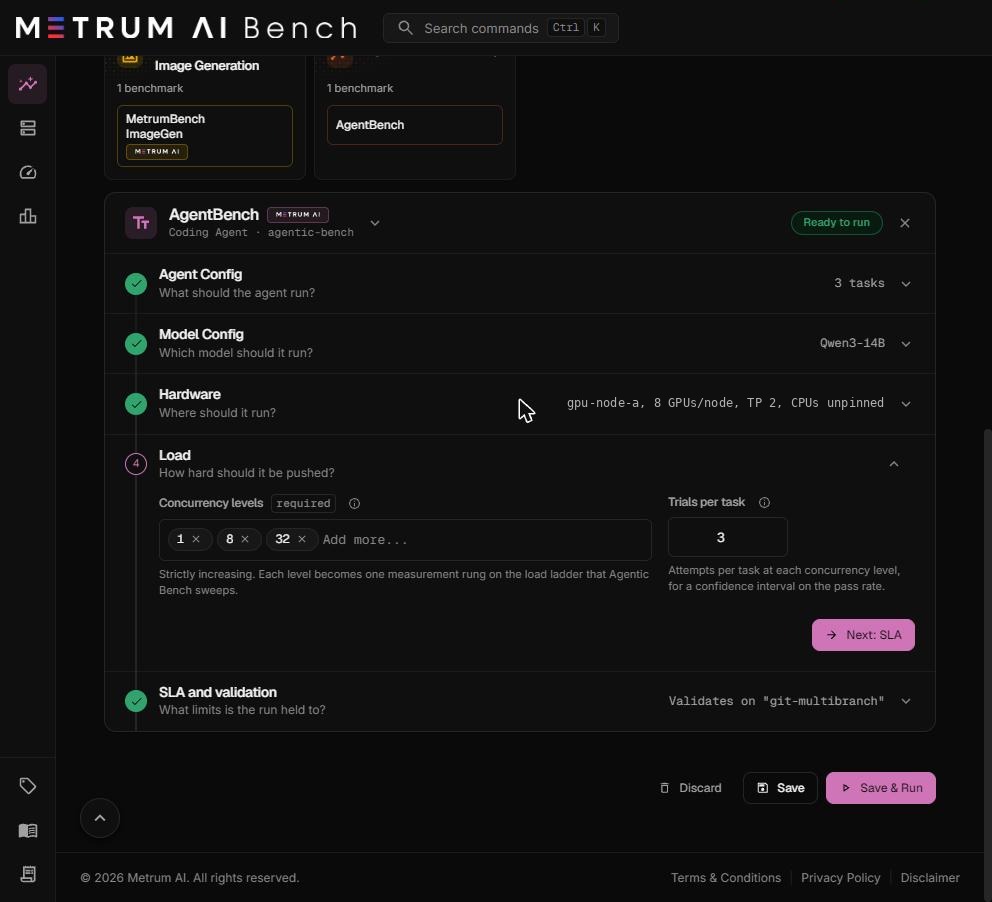
This creates three measurement levels. With one task and 3 trials per task, the 1-agent level runs 3 trials, the 8-agent level runs 8, and the 32-agent level runs 32. A level always runs at least as many trials as it has agents.
Step 6: Set the SLA and launch
- Check that Validation task shows
fix-git. - In Agent time multiplier, enter 2. This doubles each task's own time limit, which leaves room for agents that wait in the model server's queue.
- Keep the other fields at their defaults: minimum pass rate 85%, minimum GPU busy ratio 60%, no output token cap, model default reasoning effort.
- Select Save & Run.
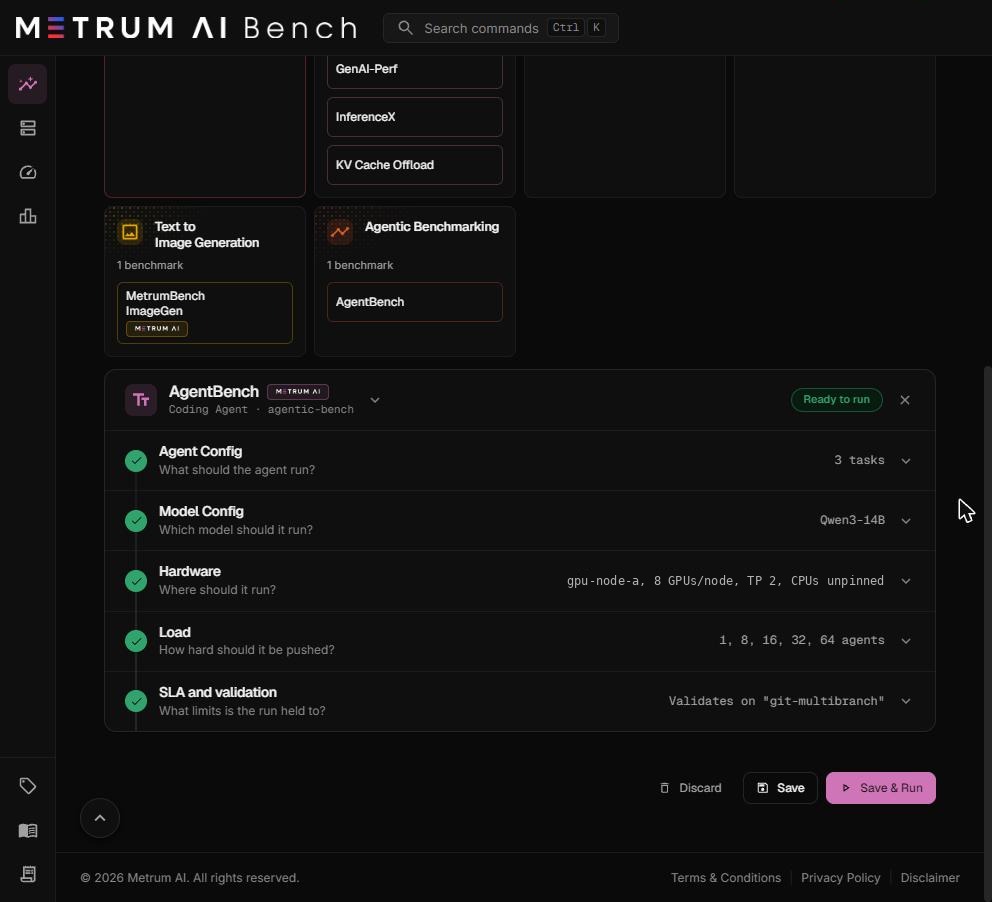
The workload card shows Ready to run when every step is complete. Save & Run saves the project and starts the run. Save stores the project without running it.
Step 7: Watch the run
Open the run from Monitoring. The stage tracker shows each stage as it starts and finishes:
- Host checks
- Benchmark runtime
- Kubernetes cluster
- Model deployment
- Pods starting
- Model loading
- Serving endpoint
- Validation trial
- Measurement
- Teardown
A banner states what the run is doing, for example "Downloading model weights and loading them onto the GPUs". The Rungs table lists the validation trial and each concurrency level with its progress.
Step 8: Read the result
When the run finishes, open its report from Monitoring. For this example on a supported GPU, every trial is expected to pass.
| Level | Trials | Expected pass result |
|---|---|---|
| Validation | 1 | Passed |
| 1 agent | 3 | 3 of 3 passed |
| 8 agents | 8 | 8 of 8 passed |
| 32 agents | 32 | 32 of 32 passed |
The Verdict section names the highest level that met both thresholds: the 85% pass rate and the 60% GPU busy ratio. A small test like this one often keeps the GPUs below 60% busy, because a few agents working one short task leave the GPUs idle between model calls. In that case, the levels show Missed a gate on the GPU busy ratio, and the verdict names no qualified level. For a smoke test, this is expected: the pass results show that your setup works. To find the real capacity of your hardware, add higher levels in your next run.
If a stage fails, the stage tracker shows the reason. See Troubleshooting.
What's next
- Add more task codes and higher levels: Configure an Agentic Bench run.
- Use more machines or split prefill and decode: Hardware, parallelism, and sandboxes.
- Understand each number in the report: Monitor a run and read the report.